Week 1

Make Your Own Compass in the Wilderness
Supplies:
Bowl of water
Leaf (or other floatable material)
Sewing needle
Magnet
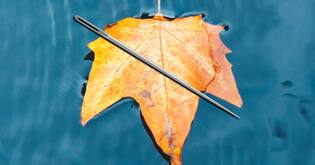
Hold the needle and swipe it with a magnet outward about 50 times in the same direction. Float the leaf in the water bowl. Place the magnetized needle gently on the leaf. Compare the needle to the real compass or compass app.
How it works: All magnets have two poles, north and south. The north pole is attracted to the south pole (opposites attract). The Earth has a magnetic field that attracts or repels other magnets. Rubbing the needle with a magnet, silk, your hair or animal fur can temporarily turn the needle into a weak magnet.
https://offgridsurvival.com/how-to-make-a-compass-in-the-wild/
And at home:
https://parentingchaos.com/how-to-make-a-compass/
or
https://www.bbc.co.uk/bitesize/topics/zrvbkqt/articles/zfb6pb
Tip: you can also use tinfoil, a water bottle cap or a cork to float the needle.

Make Your Own No-Sew Adventure Pack
Supplies:
Old t-shirt
Scissors
Straight edge ruler
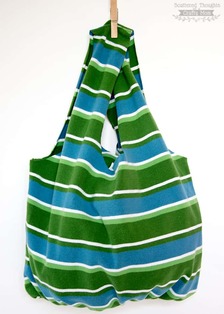
Fold the t-shirt in half. Cut a deeper scoop out of the neck. Cut deeper scoops from armholes. (these will be the handles) Turn the t-shirt inside out and lay flat. Measure about 2-3 inches up from the bottom of the shirt. Cut about ¼ inch strips all along the bottom. Tie each strip together. Go back and tie one end of the strip to the stip next to it. When finished tying all the strips turn the bag inside out. Now you have a tote bag for groceries, carrying books or hiking!
Did you know? It can take 700 gallons of water to make 1 t-shirt! Clothes take about 40 years to decompose and a shoe 1,000 years! Hand-me-downs, thrift store shopping, and repurposing clothing are great ways to reuse clothing.
https://www.scatteredthoughtsofacraftymom.com/how-to-make-tote-bag-from-t-shirt-no-sewing/
or
https://www.youtube.com/watch?v=zgpaM3u2zng
Tip: you can use a t-shirt from your favorite vacation, sports team or park!
Fill your bag with all your hiking necessities; compass, journal, water bottle etc...

Make Your Own Nature Journal
Supplies:
A box from the recycle bin (like a cereal box)
Scissors and tape
Paper
Stick about 8 inches long
Rubber bands, ribbon, or bailing twine
3-hole punch
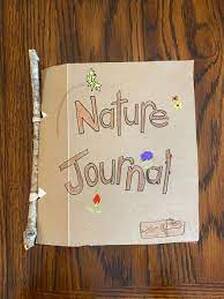
Simplest instructions: Cut box to fit around 8.5X11 paper. Use 3-hole punch on the paper and cardboard. Turn the cardboard box so the brown faces outward. (so you can color on the cover) Line up paper and cardboard cover, use a stick as a spine, and tie them together with twine or ribbon.
Journaling is relaxing and a great way to slow down, observe and learn more about the environment that we all share.
https://learningwithoutdoors.com/learningactivities/
or
https://makingtimeformommy.com/2016/04/01/how-to-make-a-nature-journal-for-kids-writing-prompts-included/
or
https://johnmuirlaws.com/
Tip: Make your journal your own. If you like plants, focus on plants; if you love birds, make a bird journal. Record: date, time, location, habitat, weather, colors you see, sounds you hear, and smells in the air. Sketch what you see or collect items to place in your journal. This is your personal journal in which to reflect and enjoy!

